Can You Watch Disney Plus on a Projector?
More and more people are inclined to use projectors to watch films as they provide a more stunning and immersive viewing experience. And its flexibility and portability make the viewing place no longer limited to a specific TV screen, and can be used in various occasions such as home theaters and outdoors. So, can I watch Disney Plus on a projector?
This article provides 6 comprehensive methods to help you achieve watching Disney Plus on a projector, whether you have Internet or not, and whether you need to use a cable or not.
1. Use Smart Projector with Disney Plus Built-in
Using a smart projector with the Disney Plus app installed is the most convenient method, but if not available, you can also directly install and download it through the store. For example, the LG CineBeam is a projector that can access the Disney+ application. Users only need to log in to their Disney Plus account and have a smooth internet connection to enjoy the fantastic content of Disney+ on a large screen.
2. Use USB Drive
To avoid issues with poor outdoor network conditions, playing Disney Plus movie files offline via a USB drive is also a workable and easy solution. Most projectors nowadays come equipped with USB ports, allowing you to directly connect a USB drive to the projector and access the files stored within it.
How to Save Disney Plus Movies to USB Drive?
Firstly, you need a USB drive with sufficient capacity and video files in formats supported by the projector. Currently, projectors typically support various video formats such as MP4, MKV, MOV, and others. To save Disney Plus movies to MP4 format, you need the help of DispCam, a professional Disney+ video downloader that can easily save HD Disney+ movies for offline viewing. Since DispCam is able to download Disney Plus movies in common MP4 /MKV formats, you can play Disney Plus movies on a wide range of devices, for example, projector.
As you manage your downloaded videos, it’s always wise to be prepared for unexpected data loss. Using a recovery tool like Syncios D-Savior can help you quickly restore your files, ensuring your Disney Plus videos are always there when you need them.
Step 1 Insert the USB stick into the computer and run DispCam on your laptop.
Step 2 You need to set the video format to MP4 or MKV in the Settings window first, and set the path to store the video to your USB stick. If you don't have enough space on your USB stick, you can set the video encoding to H.265 under the "Advanced" tab to achieve a smaller file size with the same video quality.

Step 3 Find the video and go to the "Advanced Download" window to choose the specific output settings.
Step 4 Insert the USB stick with the downloaded MP4 Disney Plus movie into the USB port of the projector.
Step 5 Some projectors may automatically pop up a window showing that a new media source has been recognized, while others may require you to use the remote control to select a "USB" input source.
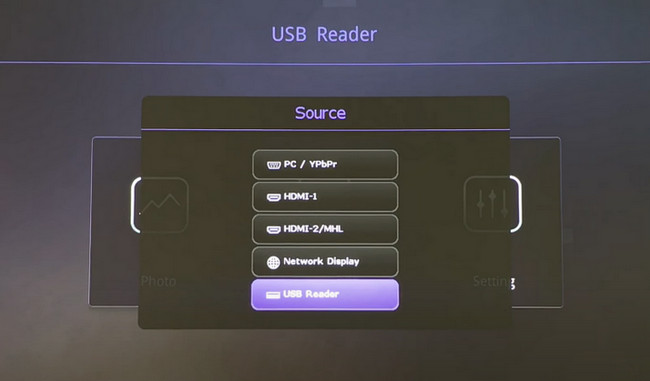
Step 6 Find the Disney Plus file in MP4 format, play it, and now you can play Disney Plus movies on your projector.
3. Use HDMI Cable
You can watch Disney Plus on projector by connecting your mobile phone or computer to the projector via an HDMI cable. Most projectors are equipped with at least one HDMI port, which is one of the most commonly used digital video and audio interfaces.
Connect Windows PC to Projector
If your Windows tablet or computer has an HDMI interface, you can directly use an HDMI cable to connect your Windows PC and projector. If it only has a USB port or a VGA connection, you can use a USB to HDMI converter or a VGA to HDMI converter to connect the computer and projector.
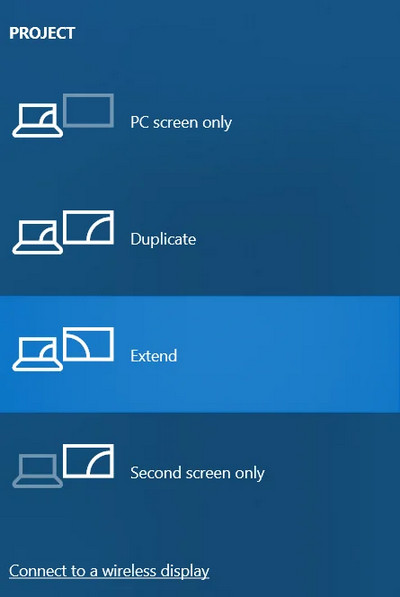
After the connection is completed, if the projector does not recognize your Windows PC, you may need to set it up so that the computer recognizes the HDMI cable connection. Press Windows key + P on your keyboard to open the Project pane and search and connect to the projector.
Connect Mac to Projector
If your Mac or MacBook has an HDMI port, there's no need to use an additional converter. For other VGA, Mini DisplayPort or USB-C ports, you need to purchase the correct adapter.
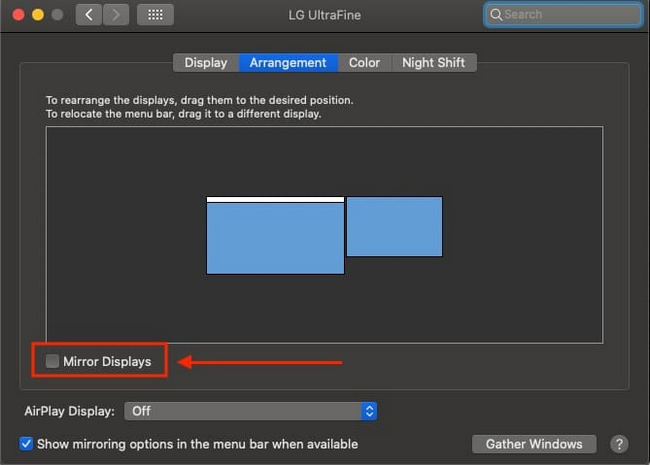
If your Mac or MacBook does not automatically detect the projector, please select the "System Preferences" option in the Apple menu. Click on the "Displays" icon and select the "Arrangement" tab. Check the "Mirror Displays" option to mirror your Mac.
Connect iPhone and iPad to Projector
To watch Disney Plus on a projector through an iPhone or iPad, you need a Lightning Digital AV Adapter to connect the iPhone/iPad and the projector. Select the correct HDMI input source on the projector, open the Disney Plus app, and the played Disney Plus movie will be displayed.
If the Disney Plus movie doesn't show up, make sure all the wires are secure and you're using an official adapter. Finally, please restart your projector and iPhone/iPad.
Connect Android Phone to Projector
Use a USB to HDMI adapter to connect the USB side to your Android phone and the HDMI side to the projector, and select the correct input on the projector.
Likewise, if Disney Plus does not appear on the projection, please follow the iPhone/iPad method above and try again.
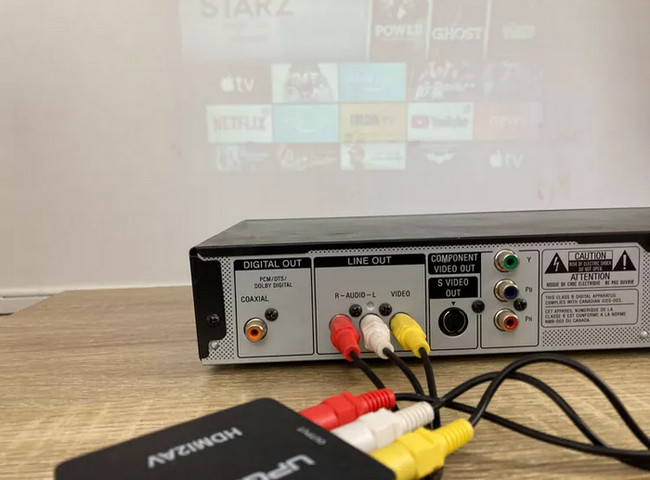
Even if you are using an older projector with a VGA connection, you can project Disney Plus through your phone or computer as long as you have the appropriate converter or adapter cable.
4. Use Airplay
Since Disney Plus supports Airplay technology, you can project Disney Plus movies by connecting your iPhone, iPad, or Mac to an AirPlay-compatible projector via Wi-Fi. However, please note that Disney Plus has stated that Disney+ Basic users are unable to use the Apple Airplay feature to play Disney Plus movies due to a technical issue.
If your projector is not compatible with AirPlay, you will need the assistance of an intermediary device that supports AirPlay:
- Apple TV (3rd and 4th generation or later) with tvOS 15.3 and higher
- TVs compatible with AirPlay 2
Connect the AirPlay-enabled intermediary device to the projector via the HDMI cable, then use AirPlay to project Disney Plus from your iPhone, iPad, or Mac to the intermediate device and finally transmit the content to the projector through the intermediary device.
Note: In either case, please note that all devices used need to be connected to the same Wi-Fi network.
Airplay iPhone and iPad
If you want to use the Airplay function on your iPhone/iPad, you need to have iOS 12.3 or higher.
Step 1 Open the Disney Plus app on your iPhone or iPad. Find and play the movie you want to project.
Step 2 Click the Airplay icon at the top of the screen.
Step 3 Select your projector or Airplay-enabled intermediate device from the list.
Airplay Mac
Your Mac needs to be running macOS Mojave 10.14.5 or higher to use the Airplay function. On older macOS systems, the Airplay icon was displayed directly in the menu bar. Click on the icon and then select your projector or intermediate device. If the Airplay icon is not displayed, go to "System Preferences" > "Displays" and check "Show mirroring options in the menu bar when available" option.
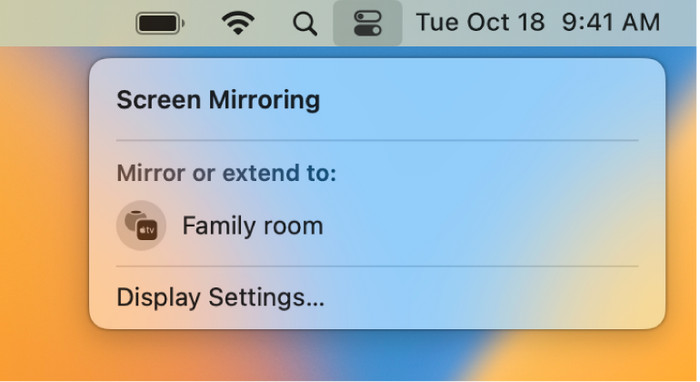
When your Mac is running macOS 11.0 or later, click the Control Center icon first in the menu bar. Click the "Screen Mirroring" icon and select your projector/intermediate device from the list of available devices.
5. Use Miracast
Miracast is also one of the common screen mirroring technologies, providing a simple and wireless way to share screen content. You can project video from Windows PCs and Android devices to Miracast-enabled projectors via Miracast. However, you need to ensure that both the source device and the target device projector are connected to the same Wi-Fi network.
Windows 10: Click the Action Center icon on the taskbar, choose the Connect icon and select your projector.
Windows 11: Click the Network icon on right side of the taskbar, choose the Cast option and pick your projector.
Android device: Go to "Settings", find the "Display" or "Cast" option. Enable Miracast option and sometimes Miracast may be labeled "Wireless Display" or similar terms. Find your projector from the displayed results.
Some users have reported that Disney+ will not play on Miracast. This is because certain content providers for Disney Plus may restrict casting and sharing. Specific circumstances may vary depending on the region, device, and other factors.
6. Use Media Streaming Devices
Combining a streaming device with a projector is also a great solution, turning your projector into a smart device. Common streaming media devices include Chromecast, Roku Streaming Stick, Amazon Fire TV Stick, etc. Please refer to the Disney Plus Help Center for specific supported system requirements.
These portable streaming sticks all offer access to a variety of online streaming services, so you can play Disney Plus by simply plugging them into the projector's HDMI port (an HDMI to VGA adapter is required if the projector has a VGA End).
How to Connect Streaming Stick to a Projector?
Here we will use Fire Stick as an example to introduce how to play Disney Plus on a projector via streaming devices.
Step 1 Connect the Fire Stick to a USB power source, and plug the Fire Stick into the HDMI input port on the projector (if necessary, use an HDMI extension cable and a suitable adapter).
Step 2 Turn on the projector and switch the input source to the HDMI input connected to the Fire TV Stick.
Step 3 The Fire Stick's home screen will appear on the projector. If this is your first time using the Fire TV Stick, follow the on-screen instructions to complete the setup process.
Step 4 Download the Disney Plus app from Appstore and sign into your Disney Plus account.
Step 5 Use the remote to browse the Disney Plus library, and now you can watch Disney Plus on projector.
 Learn More: Does Amazon Fire TV Stick Work with Disney+?
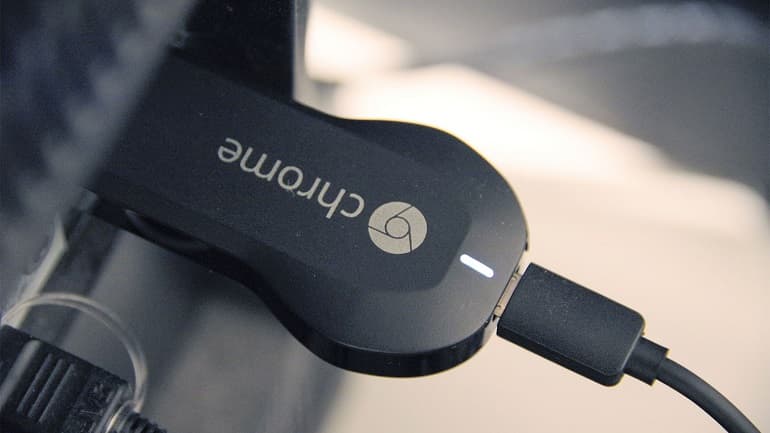
In addition to the above methods, Disney Plus also allows you to use Chromecast to cast Disney Plus movies from your mobile device or computer. This requires that you have compatible devices and that all devices are connected to the same network.
 Learn More: Disney Plus on Chromecast: How to Cast Disney Plus to TV?
Final Words
After reading this comprehensive guide on how to watch Disney Plus on a projector, you will understand how to adopt the appropriate methods to watch Disney Plus in different situations. All of the above methods (except the second one using a USB Drive) require a stable network to stream Disney Plus content. When the network condition is poor, or when outdoors, playing Disney Plus movies through a USB drive is the most reliable choice.

 DOWNLOAD Win
 DOWNLOAD Mac
 Tessa Kirkland